
บทเรียน: สร้างบล็อก
หน้านี้สอนอะไร
สร้างบล็อกเล็กๆ ตั้งแต่โปรเจกต์ว่างจนขึ้นระบบจริง: โครงสร้างเนื้อหา หน้า admin หน้าเว็บ ฉบับร่าง ตัวอย่างสด SEO และการ deploy ใช้เวลาประมาณ 30 นาที เลือก Nuxt หรือ Next.js ได้จากแท็บโค้ด ส่วนอื่นเหมือนกันหมด
ควรอ่านก่อน: ไม่ต้อง ขอแค่มี Node.js 22.12 ขึ้นไป
1. สร้างโปรเจกต์
npx nuxi@latest init my-blog
cd my-blog
npx create-easy-cms --db sqlite --yesnpx create-next-app@latest my-blog --ts --app --no-src-dir
cd my-blog
npx create-easy-cms --db sqlite --yescreate-easy-cms ติดตั้งแพ็กเกจ เขียน easy-cms.config.ts ใส่ EASY_CMS_SECRET แบบสุ่มลงใน .env และต่อหน้า admin กับ API เข้ากับแอปของคุณ SQLite เก็บทุกอย่างไว้ในไฟล์เดียว (cms.db) ซึ่งพอใช้จนถึงตอน deploy
2. อธิบายเนื้อหา
แทนที่ easy-cms.config.ts ด้วยบล็อก: หมวดหมู่ และบทความที่มีฉบับร่างและประวัติ
import { defineConfig } from '@easy-cms/core'
import { sqlite } from '@easy-cms/db-sqlite'

export default defineConfig({
  secret: process.env.EASY_CMS_SECRET ?? '',
  db: sqlite({ url: process.env.DATABASE_URL ?? 'file:./cms.db' }),
  admin: { locale: 'th', menu: ['posts', 'categories', 'media'] },
  collections: [
    {
      slug: 'categories',
      editIn: 'drawer', // collection เล็ก: แก้ในแผงที่เลื่อนมาทับรายการ
      useAsTitle: 'name',
      access: { read: () => true },
      fields: [
        { name: 'name', type: 'text', required: true, label: { en: 'Name', th: 'ชื่อ' } },
        { name: 'slug', type: 'slug', from: 'name' },
      ],
    },
    {
      slug: 'posts',
      drafts: true, // ฉบับร่าง / เผยแพร่แล้ว
      versions: true, // ประวัติและการย้อนกลับ
      useAsTitle: 'title',
      access: {
        // ผู้เยี่ยมชมเห็นเฉพาะบทความที่เผยแพร่ ผู้แก้ที่ login เห็นฉบับร่างด้วย
        read: ({ user }) => (user ? true : { status: { equals: 'published' } }),
      },
      fields: [
        { name: 'title', type: 'text', required: true, maxLength: 120, label: { en: 'Title', th: 'ชื่อเรื่อง' } },
        { name: 'slug', type: 'slug', from: 'title' },
        { name: 'excerpt', type: 'textarea', maxLength: 300, label: { en: 'Excerpt', th: 'คำโปรย' } },
        { name: 'cover', type: 'upload', label: { en: 'Cover', th: 'รูปปก' } },
        { name: 'body', type: 'richText', label: { en: 'Body', th: 'เนื้อหา' } },
        { name: 'category', type: 'relationship', to: 'categories', position: 'sidebar' },
        { name: 'publishedAt', type: 'date', position: 'sidebar' },
      ],
    },
  ],
})
ระหว่างพัฒนา ฐานข้อมูลจะตาม config เสมอ บันทึกไฟล์แล้วตารางจะเปลี่ยนตาม
3. เปิดหน้า admin
npm run devpnpm devyarn devbun run devไปที่ http://localhost:3000/admin เนื่องจากยังไม่มีผู้ใช้ หน้า admin จะให้สร้างบัญชี admin คนแรก แล้วพาไปที่แดชบอร์ด
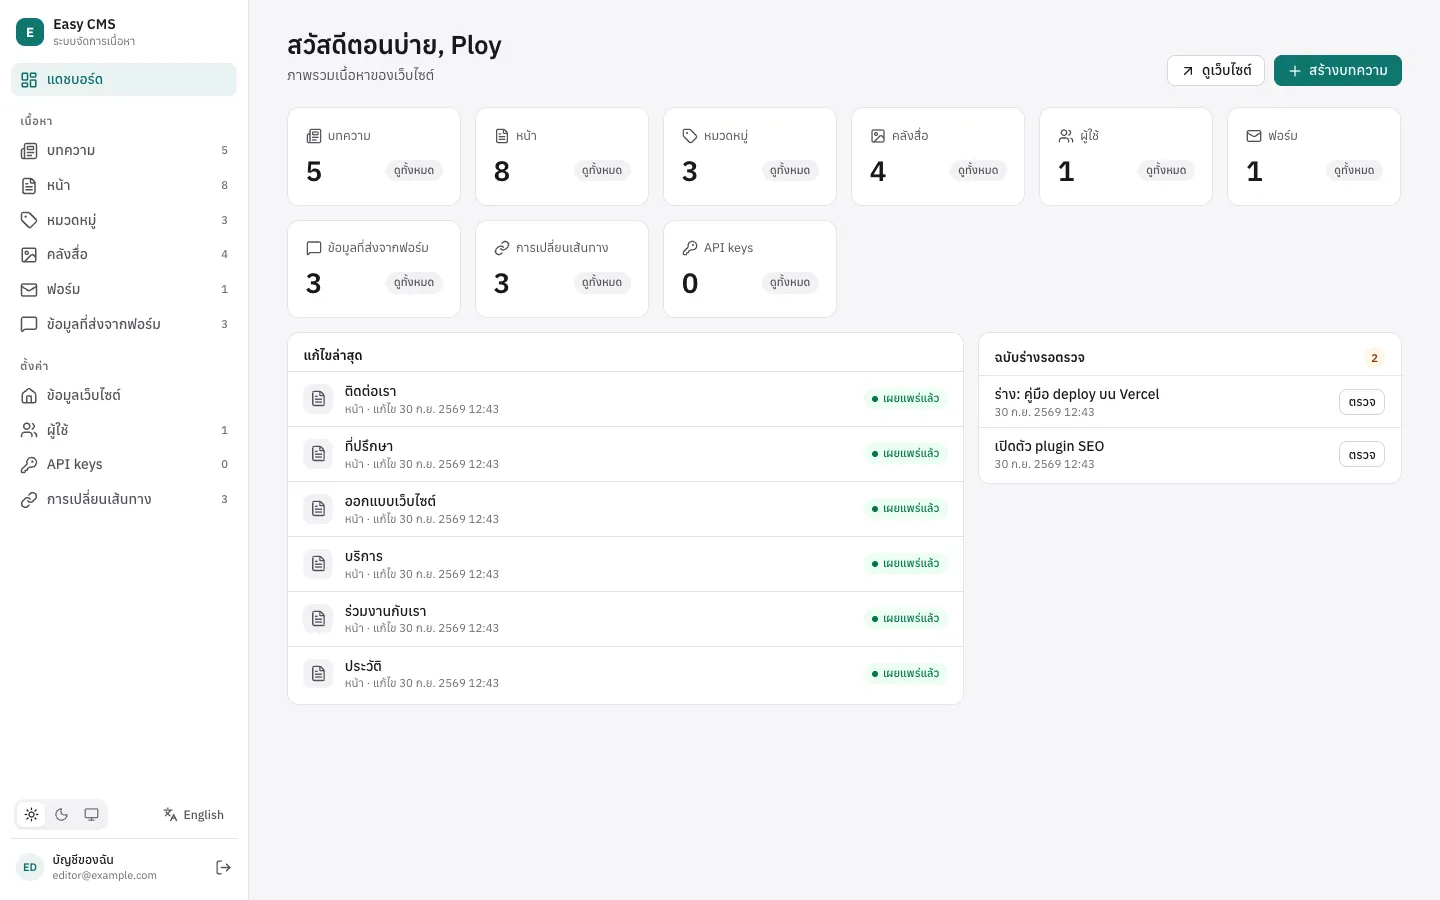
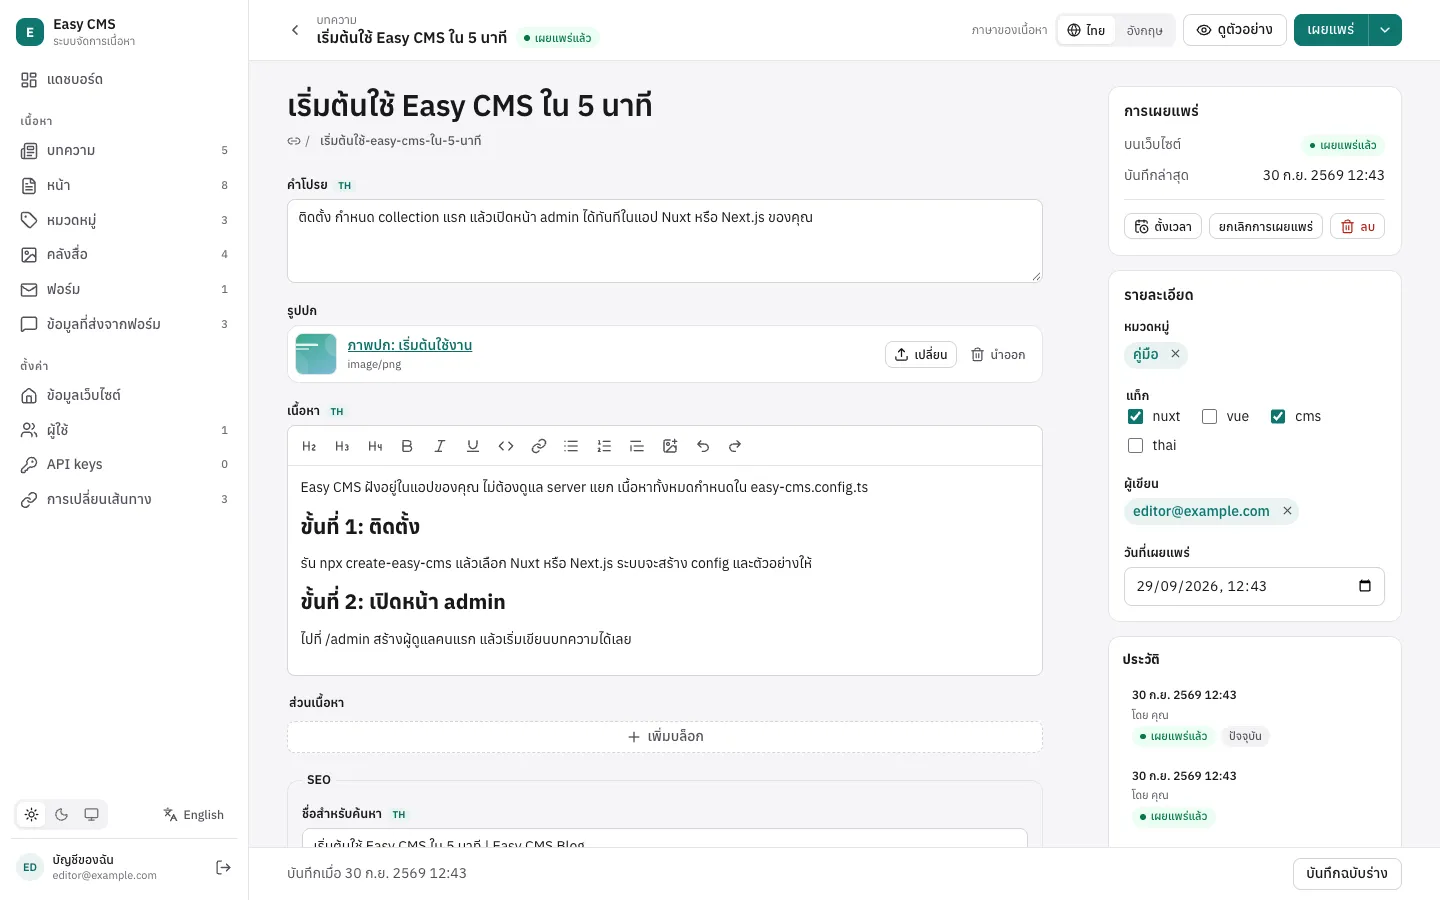
สร้างหมวดหมู่สักหนึ่งหรือสองรายการ (จะเปิดในแผงด้านข้าง) แล้วสร้างบทความ: ใส่ชื่อเรื่อง (slug เติมให้เอง) คำโปรย เนื้อหา เลือกรูปปกและหมวดหมู่ แล้วกด เผยแพร่
4. แสดงรายการบทความ
export default defineEventHandler(async () => {
  const cms = await useEasyCMS()
  const { docs } = await cms.find('posts', { sort: '-publishedAt', limit: 20 })
  return docs
})import { getEasyCMS } from '@easy-cms/next'
import Link from 'next/link'
import config from '@/easy-cms.config'
export const dynamic = 'force-dynamic'
export default async function Home() {
const cms = await getEasyCMS(config)
const { docs } = await cms.find('posts', { sort: '-publishedAt', limit: 20 })
return (
<ul>
{docs.map((post) => (
<li key={post.id}>
<Link href={`/posts/${post.slug}`}>{post.title}</Link>
</li>
))}
</ul>
)
}สำหรับ Nuxt ให้แสดงใน app/pages/index.vue:
<script setup lang="ts">
const { data: posts } = await useFetch('/api/posts')
</script>

<template>
  <ul>
    <li v-for="post in posts" :key="post.id">
      <NuxtLink :to="`/posts/${post.slug}`">{{ post.title }}</NuxtLink>
    </li>
  </ul>
</template>
find คืนเฉพาะบทความที่เผยแพร่แล้ว และ post.title มี type เป็น string ตรงจาก config ลองพิมพ์ชื่อผิดดูได้
5. แสดงบทความหนึ่งเรื่อง
ติดตั้งตัวแปลง rich text:
npm install @easy-cms/richtextpnpm add @easy-cms/richtextyarn add @easy-cms/richtextbun add @easy-cms/richtextexport default defineEventHandler(async (event) => {
const cms = await useEasyCMS()
const user = await useEasyCMSUser(event)
const { docs } = await cms.find('posts', {
where: { slug: { equals: getRouterParam(event, 'slug') } },
limit: 1,
user, // ผู้แก้เห็นฉบับร่าง ผู้เยี่ยมชมเห็นเฉพาะที่เผยแพร่
overrideAccess: false,
draft: user !== null,
})
if (!docs[0]) throw createError({ statusCode: 404 })
return docs[0]
})import { getEasyCMS, getEasyCMSUser } from '@easy-cms/next'
import { renderRichText } from '@easy-cms/richtext'
import { notFound } from 'next/navigation'
import config from '@/easy-cms.config'
export const dynamic = 'force-dynamic'
export default async function PostPage({ params }: { params: Promise<{ slug: string }> }) {
const { slug } = await params
const cms = await getEasyCMS(config)
const user = await getEasyCMSUser(config)
const { docs } = await cms.find('posts', {
where: { slug: { equals: decodeURIComponent(slug) } },
limit: 1,
user, // ผู้แก้เห็นฉบับร่าง ผู้เยี่ยมชมเห็นเฉพาะที่เผยแพร่
overrideAccess: false,
draft: user !== null,
})
const post = docs[0]
if (!post) notFound()
return (
<article>
<h1>{post.title}</h1>
<div dangerouslySetInnerHTML={{ __html: renderRichText(post.body) }} />
</article>
)
}สำหรับ Nuxt หน้า app/pages/posts/[slug].vue:
<script setup lang="ts">
import { renderRichText } from '@easy-cms/richtext'

const route = useRoute()
const { data: post } = await useFetch(`/api/posts/${route.params.slug}`, {
  headers: useRequestHeaders(['cookie']), // ให้ผู้แก้เห็นฉบับร่างของตัวเอง
})
const html = computed(() => renderRichText(post.value?.body))
</script>

<template>
  <article v-if="post">
    <h1>{{ post.title }}</h1>
    <div v-html="html" />
  </article>
</template>
renderRichText escape ทุกอย่าง HTML ที่ได้จึงใส่ในหน้าได้อย่างปลอดภัย (slug ภาษาไทยใช้ได้ Next.js จะ encode ใน URL จึงต้อง decodeURIComponent)
6. ฉบับร่างและประวัติ
เปิดบทความ แก้ชื่อเรื่องแล้วกด บันทึกฉบับร่าง เว็บยังแสดงเวอร์ชันที่เผยแพร่อยู่ ส่วนหน้า admin จะบอกว่ามีการแก้ที่ยังไม่เผยแพร่ พร้อมแล้วก็กด เผยแพร่ ทุกครั้งที่บันทึกจะถูกเก็บไว้ใน ประวัติ ด้านขวา เปิดเวอร์ชันเก่าแล้วย้อนกลับได้
อยากให้ขึ้นเว็บพรุ่งนี้ 9 โมง? เพิ่ม schedule: true ให้ collection posts แล้วใช้ ตั้งเวลา ข้างปุ่มเผยแพร่ ดู ฉบับร่าง เวอร์ชัน และการตั้งเวลา
7. ตัวอย่างสด
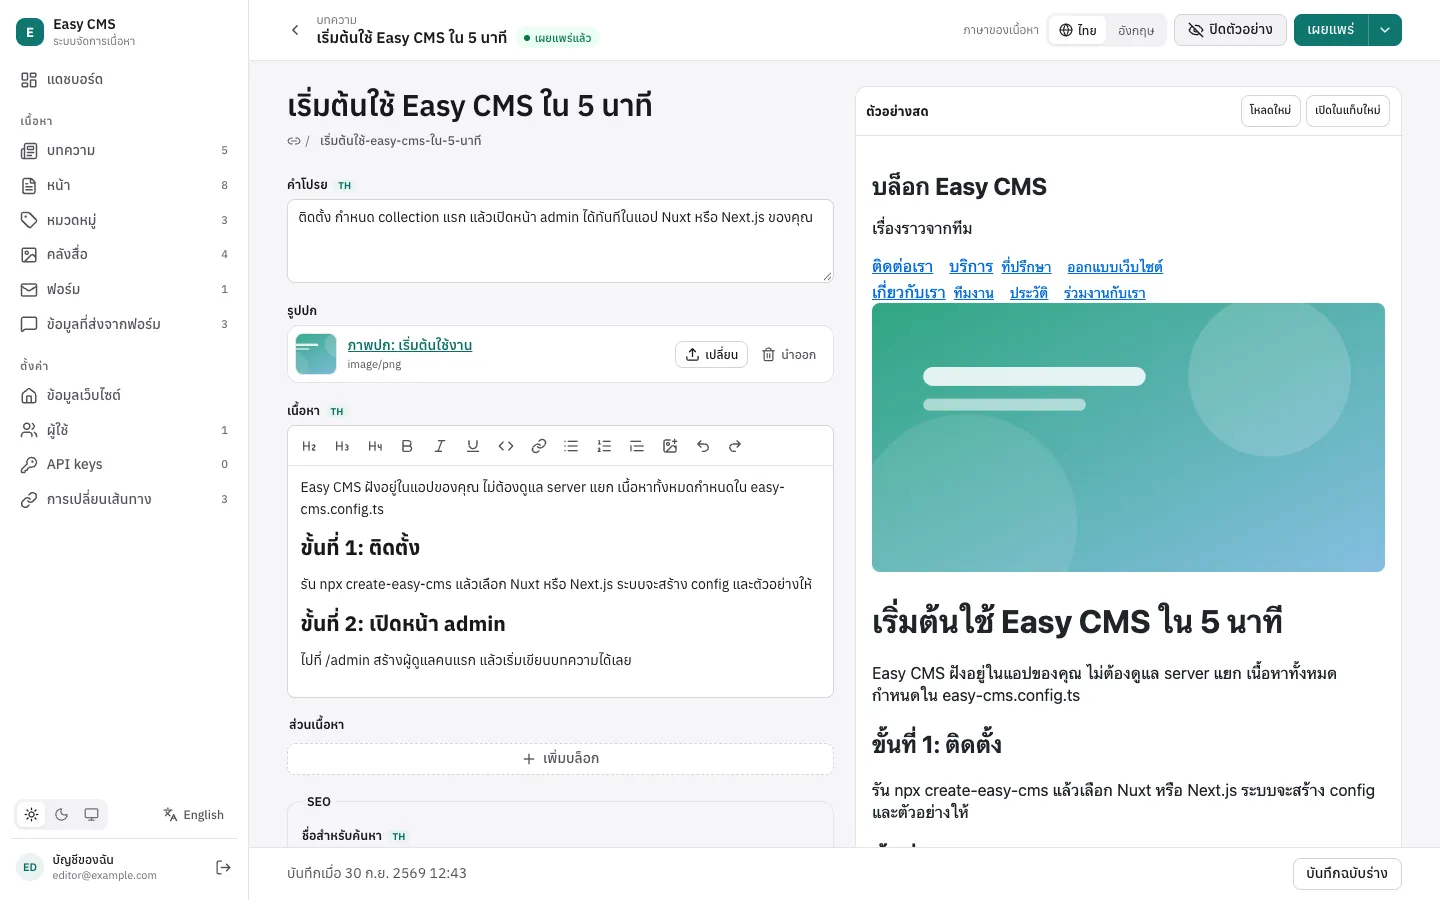
บอก Easy CMS ว่าบทความแสดงที่หน้าไหน แล้วให้หน้านั้นตามฟอร์ม:
// ใน collection posts
preview: ({ doc }) => (doc.slug ? `/posts/${doc.slug}` : null),<script setup lang="ts">
// …ต่อจาก useFetch
useLivePreview(post) // import ให้อัตโนมัติ
</script>'use client'
import { useLivePreview } from '@easy-cms/next/live-preview'
// แสดงบทความที่นี่ แล้วใช้ <PostView post={post} /> ในหน้า
export function PostView({ post: initial }: { post: { title: string } }) {
const post = useLivePreview(initial)
return <h1>{post.title}</h1>
}กด ดูตัวอย่าง ในหน้าแก้ไข หน้าเว็บจริงจะแสดงข้างฟอร์มและเปลี่ยนตามที่พิมพ์
8. SEO
npm install @easy-cms/plugin-seopnpm add @easy-cms/plugin-seoyarn add @easy-cms/plugin-seobun add @easy-cms/plugin-seoimport { seoPlugin } from '@easy-cms/plugin-seo'
export default defineConfig({
// …
plugins: [
seoPlugin({
collections: ['posts'],
generateTitle: ({ doc }) => `${doc.title} | บล็อกของฉัน`,
generateDescription: ({ doc }) => doc.excerpt as string,
}),
],
})บทความจะมี group SEO พร้อมตัวนับความยาว ตัวอย่างผลการค้นหา และปุ่มสร้างให้ ใช้ seoMeta(post) ในหน้าบทความเพื่อใส่ <title> คำอธิบาย และแท็กสำหรับแชร์ ดู SEO
9. Deploy
สร้าง migration แรก เพราะบน production ฐานข้อมูลจะไม่เปลี่ยนเอง:
bashnpx easy-cms migrate:create init git add easy-cms/migrations && git commit -m "CMS schema"bashpnpm exec easy-cms migrate:create init git add easy-cms/migrations && git commit -m "CMS schema"bashyarn easy-cms migrate:create init git add easy-cms/migrations && git commit -m "CMS schema"bashbunx easy-cms migrate:create init git add easy-cms/migrations && git commit -m "CMS schema"เลือกฐานข้อมูล SQLite ใช้ได้บน server ที่มีดิสก์ถาวร ถ้าเป็นแพลตฟอร์ม serverless ให้เปลี่ยนเป็น Postgres:
npm install @easy-cms/db-postgresและdb: postgres({ url: process.env.DATABASE_URL })ดู ฐานข้อมูลตั้ง environment บน server:
EASY_CMS_SECRET(สุ่มค่าใหม่ อย่าใช้ค่าจากเครื่องคุณ),DATABASE_URLและNODE_ENV=productionmigrate แล้วค่อยเริ่ม ทุกครั้งที่ deploy:
bashnpx easy-cms migrate npm run build && npm startbashpnpm exec easy-cms migrate pnpm build && pnpm startbashyarn easy-cms migrate yarn build && yarn startbashbunx easy-cms migrate bun run build && bun run startเก็บไฟล์อัปโหลดให้ปลอดภัย ค่าเริ่มต้นเก็บใน
uploads/ถ้าเป็น serverless หรือมีหลาย server ให้ใช้ S3 หรือ Cloudflare R2 (ดู อัปโหลด)
ไล่ดูเช็กลิสต์ก่อนขึ้นระบบจริง และตั้งการสำรองข้อมูล
ขั้นต่อไป
- สูตรสำเร็จ: คำตอบสั้นๆ สำหรับงานที่พบบ่อย
- การควบคุมสิทธิ์: ให้ผู้เขียนแก้ได้เฉพาะบทความของตัวเอง
- หลายภาษา: บล็อกภาษาไทยและอังกฤษ